UE5 Pseudo Fluid Dissolve
This is a pseudo simulation because I cut corners with curl noise from Niagara instead of running actual fluid dynamics. The effect is screen-space, using dot products and Blueprint math for bounds projection. The key is advection: using current frame values to predict where particles were in the previous frame, making the dissolve look like it's actually flowing.
Table of Contents
Niagara Simulation Stages
Niagara's simulation stages let me do compute-like operations, which is pretty powerful. I use a specific kind of render target that can write to the current frame while also reading from the previous frame - that's critical for the advection to work. Without being able to compare current vs previous values, you can't predict motion.
Curl Noise Advection
This is what makes the "fluid" look fluid. Advection predicts where values were in the previous frame using velocity. I sample curl noise to get divergence-free motion (those swirling patterns you see in real fluids) without actually solving any fluid equations.
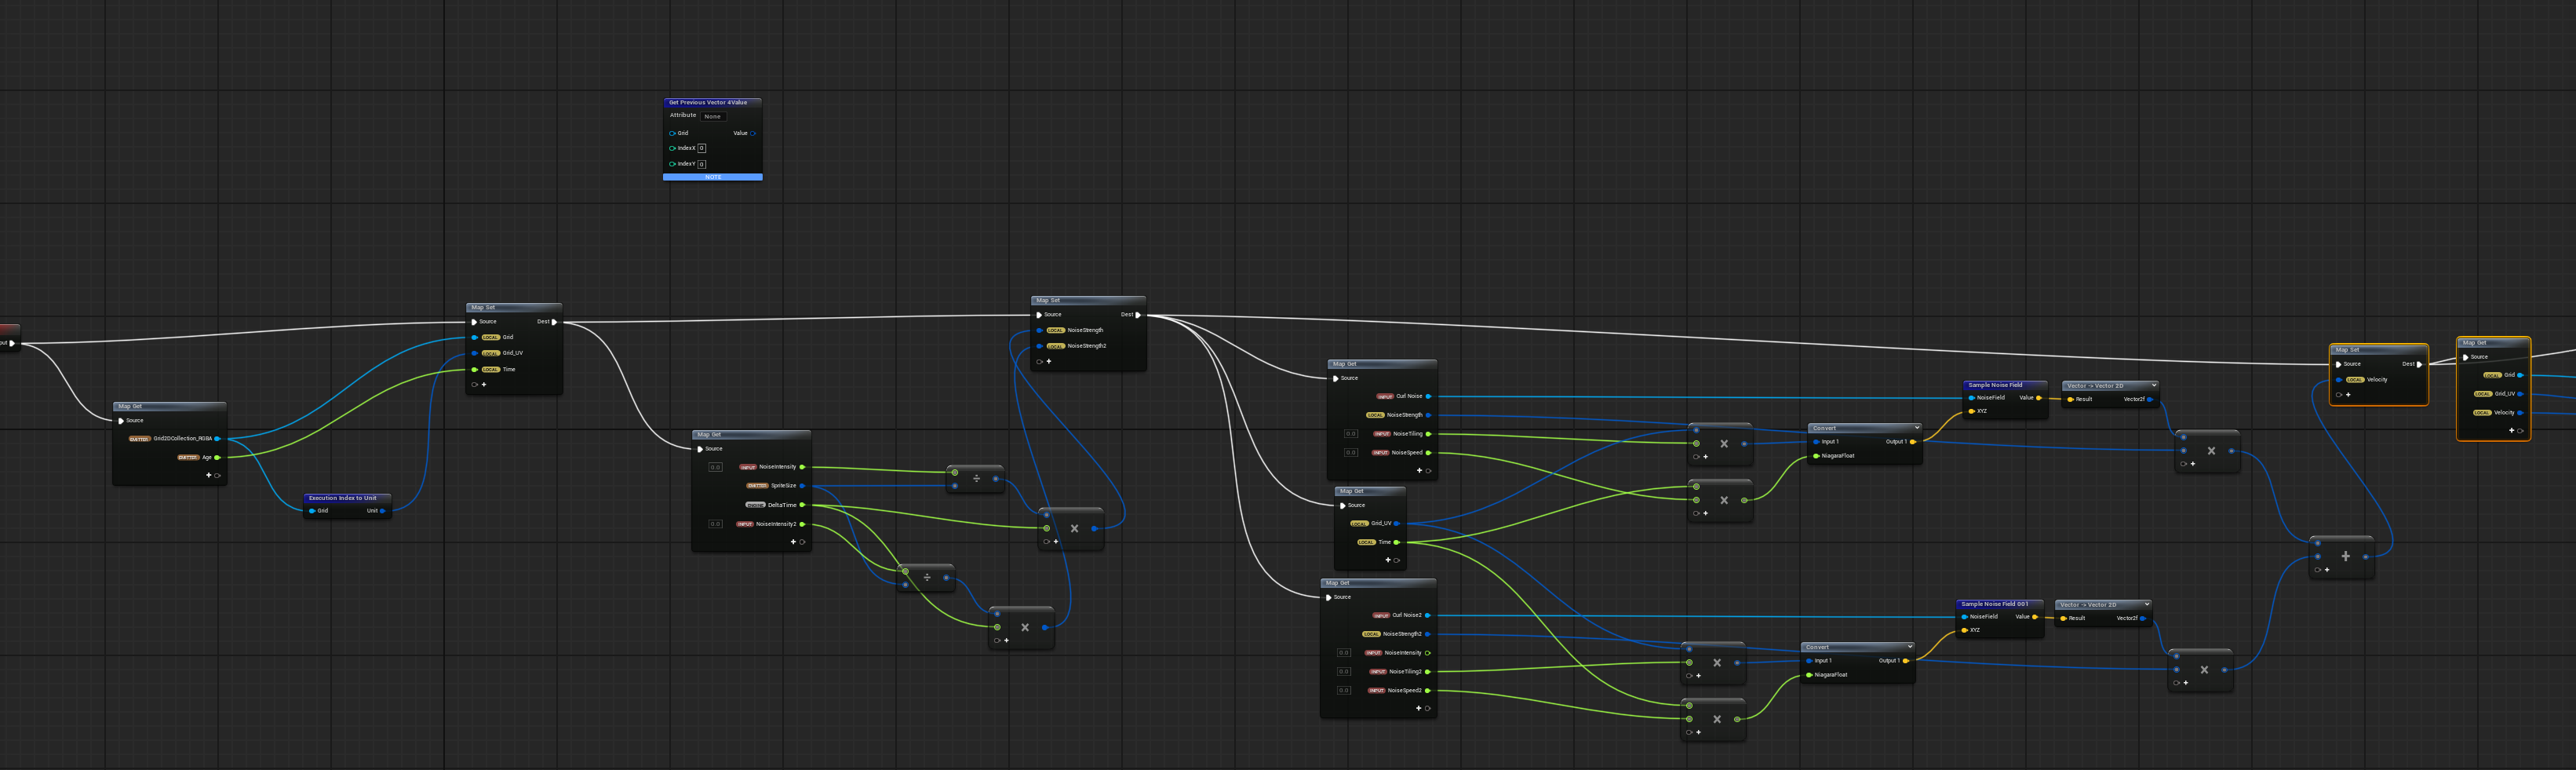
Curl noise velocity field setup
I get the grid UV, sample the velocity, and look up where that pixel was last frame. Then I pull that value forward. This is the core of what makes it feel like the dissolve is "flowing" instead of just fading.
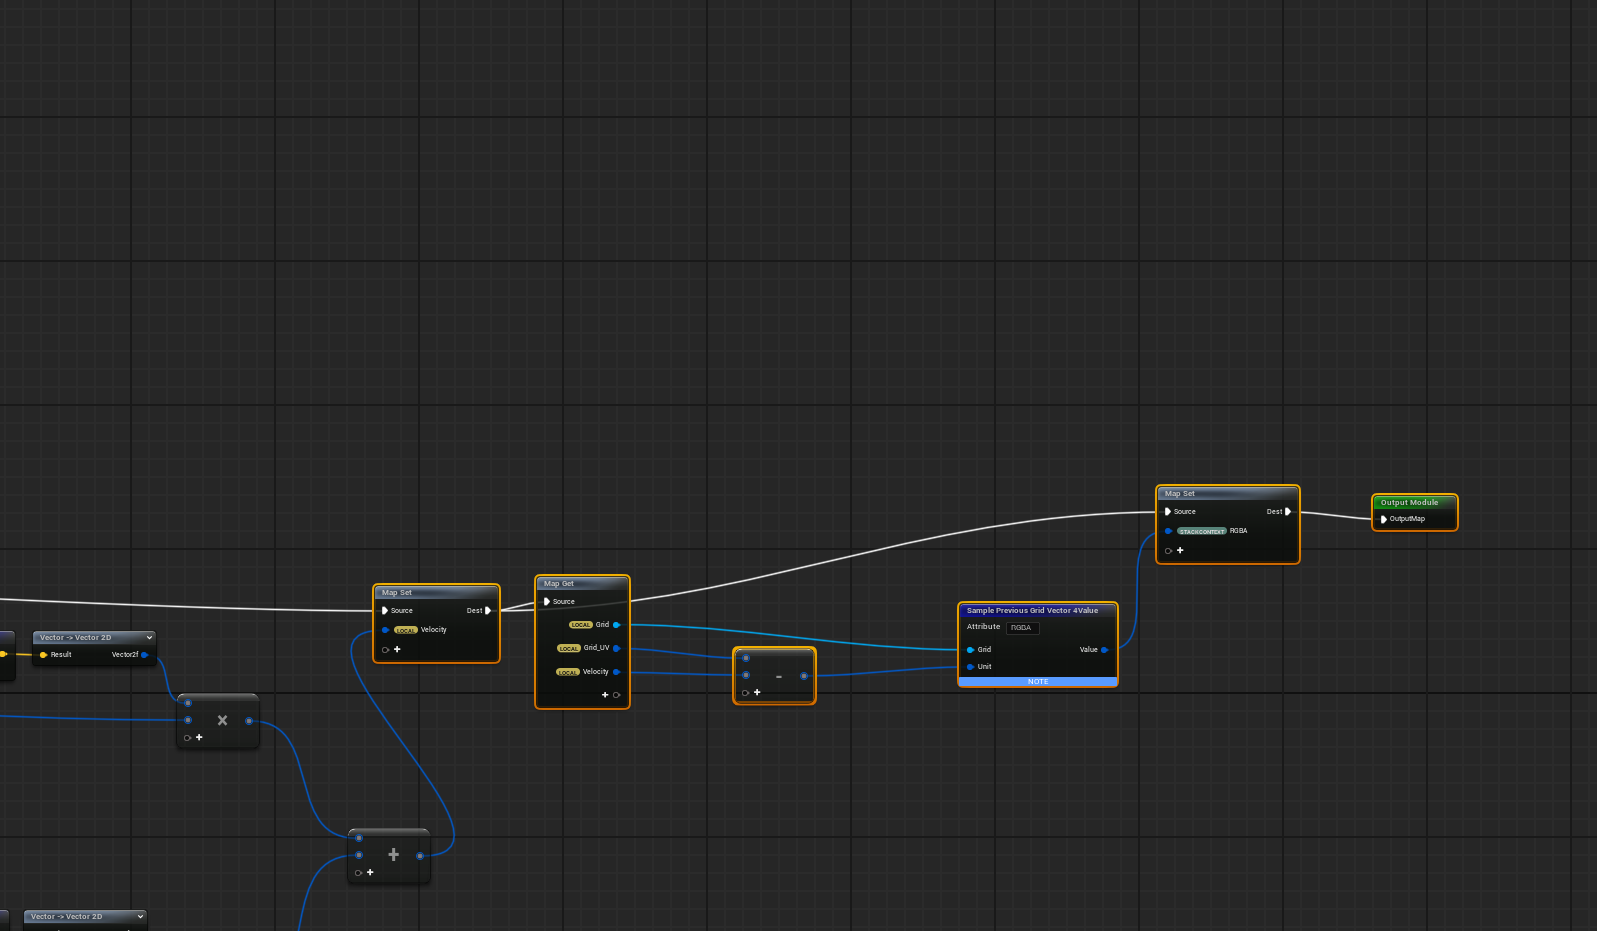
Previous frame sampling for advection
Directional Dissolve with Dot Product
Because of how I use dot product for the dissolve direction, I can actually dissolve from any angle: bottom to top, left to right, diagonal, whatever. Just change the vector values and the dissolve follows. I calculate the min/max bounds of the object in Blueprint to get the world-space extents.
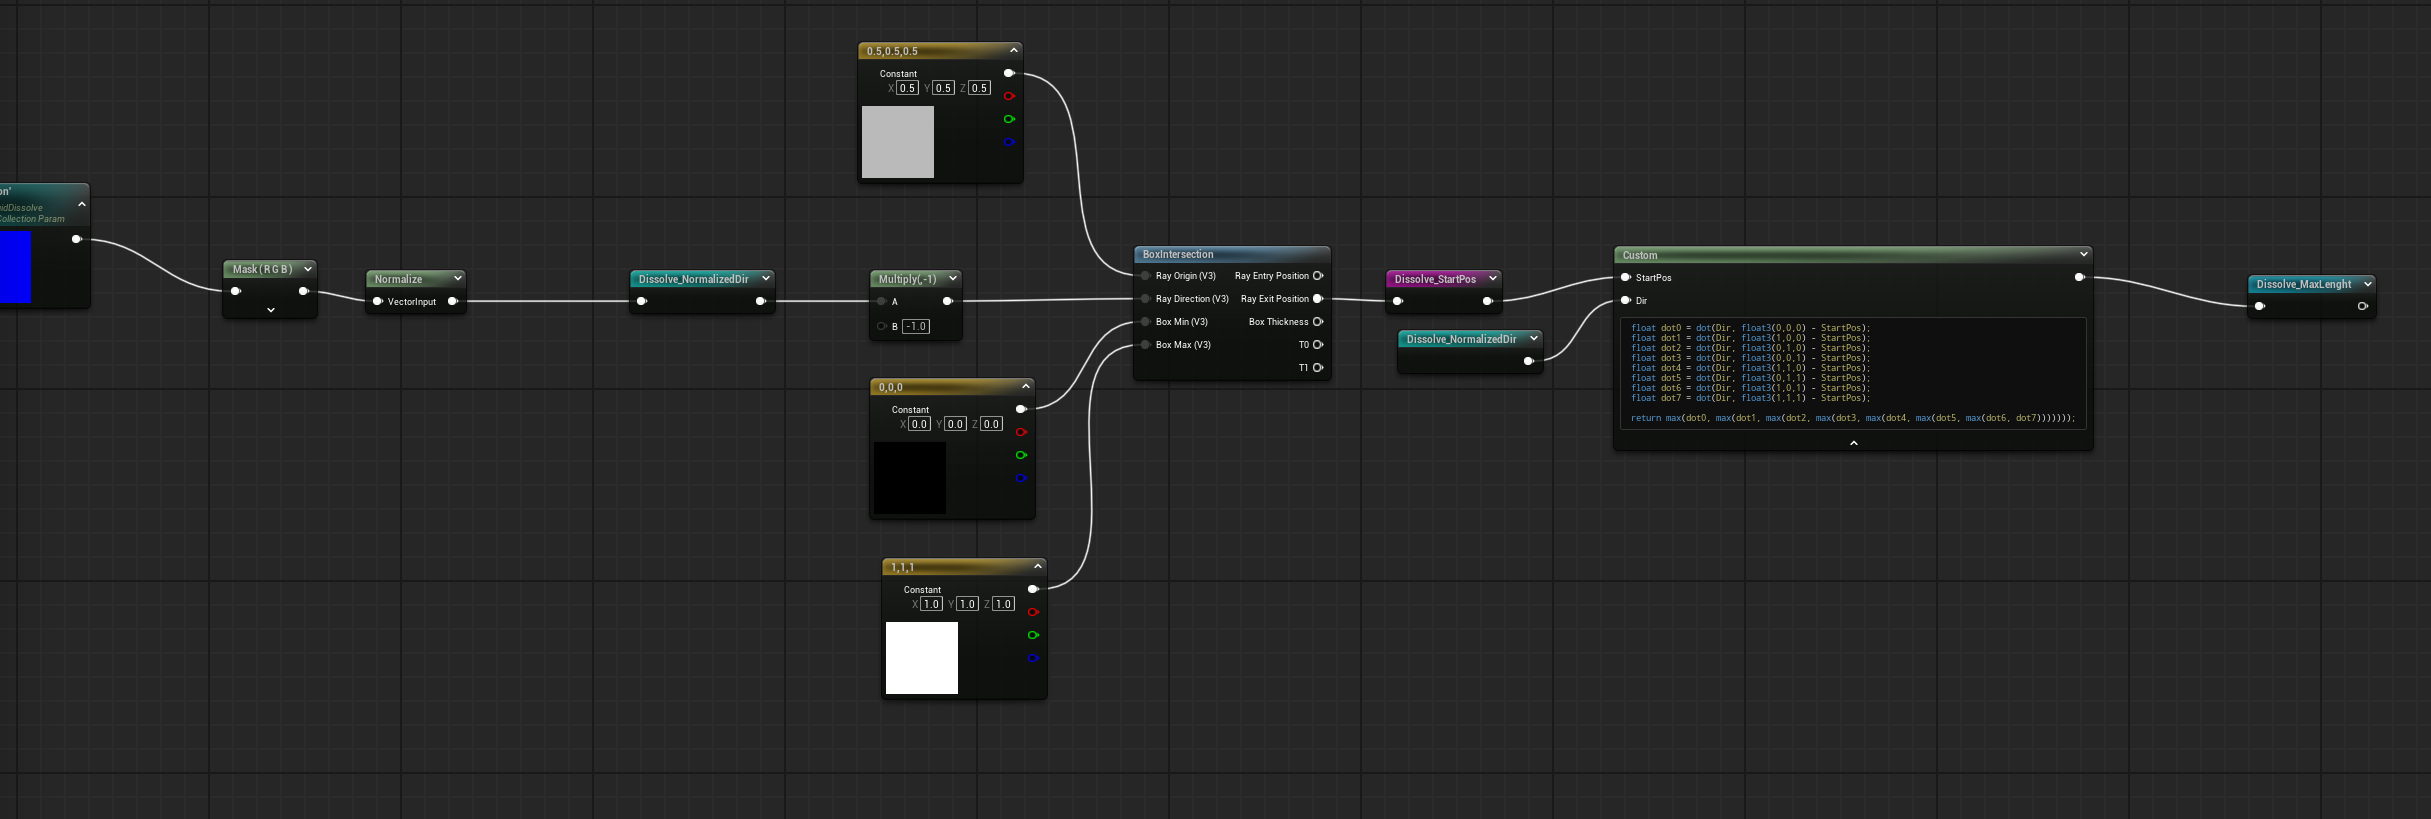
Box intersection with dot product for direction control
Dissolve Material & Stencil Setup
I layer multiple noise textures with different speeds to get variation in the dissolve edge. The dissolve starts from a direction (controlled by the dot product) and eats away at the mesh over time. Smooth step controls the falloff.
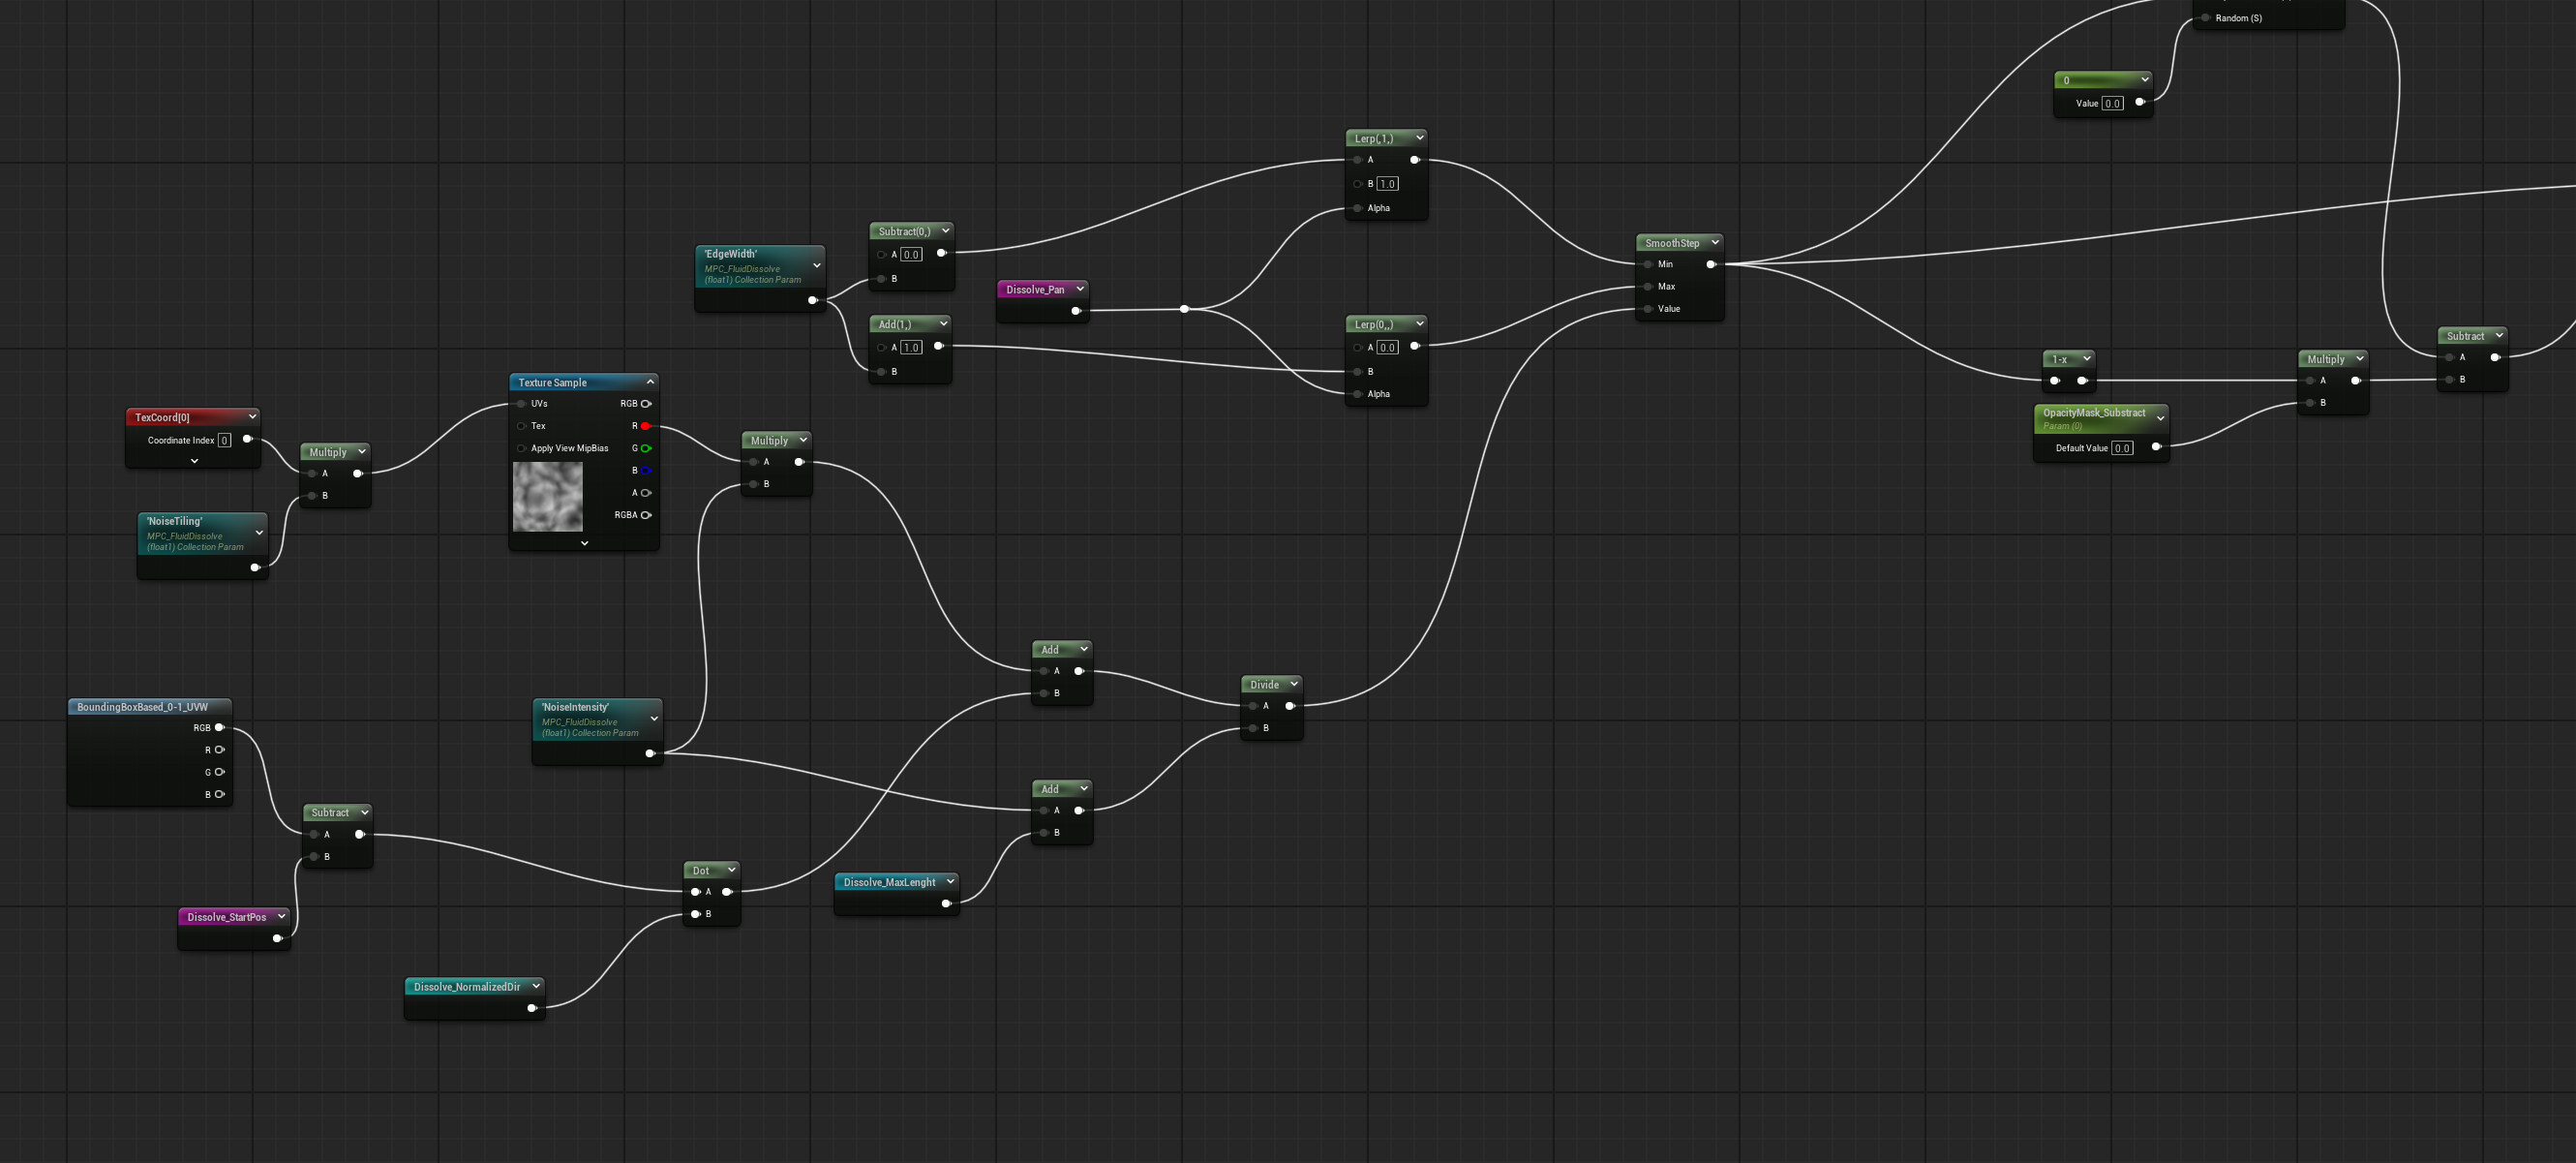
Full material graph: noise tiling, dot product direction, smooth step, and opacity mask
The Two-Mesh Stencil Trick
The key to this effect is overlapping two identical meshes with different Custom Depth Stencil Values. The main mesh dissolves first with a standard material. The dummy mesh has a stencil value set and dissolves with a slight time delay.
Because of the timing offset, there's a brief window where the main mesh has already dissolved away but the dummy mesh hasn't yet. During this window, the stencil buffer shows only the dissolving edge region - that's where the fluid simulation gets applied.
In the material, I sample the stencil buffer and only apply the advected fluid texture where the stencil value matches the dummy mesh. Everywhere else gets the normal dissolve or is fully transparent. This creates that layered effect where the fluid seems to eat into the character along the dissolve edge.
Stencil visualization: the dummy mesh reveals where the fluid effect appears
Final output samples the advected texture with a depth test for sorting. The noise makes it look like fluid filling or draining, depending on which way you run the effect.
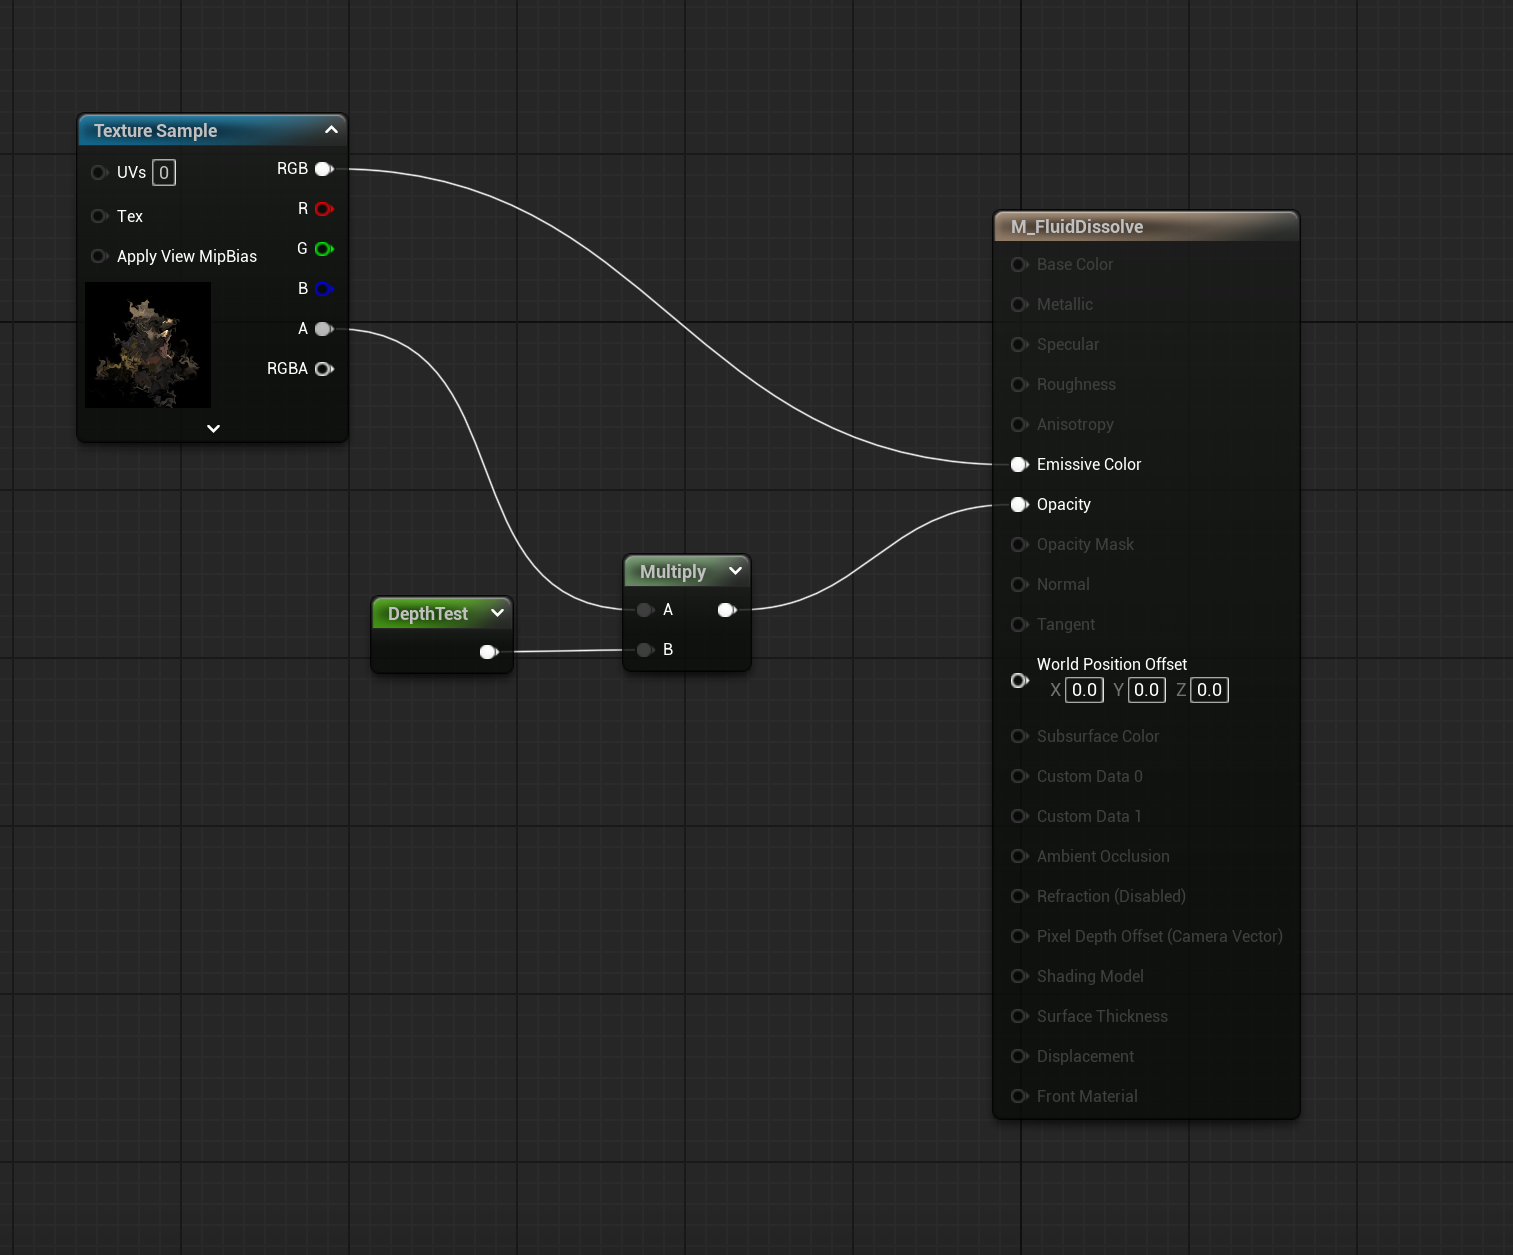
Final material with depth test output
Bonus: Fluid Appear
By reversing the animation, you get a fluid appear effect - characters materialize from the flowing texture instead of dissolving into it. Same system, just played backwards.
Reversed dissolve creates a fluid appear/spawn effect
It's called "pseudo" fluid because I'm not solving Navier-Stokes or anything - curl noise gives you that swirling, divergence-free motion for free. The combination of advection, directional control, and layered noise creates something that looks like fluid simulation without the computational cost.
Tech Stack
Simulation Stages
Compute in Niagara
Render Targets
Previous frame read
Curl Noise
Fake fluid motion
Dot Product
Direction control
Blueprint
Bounds calculation
Smooth Step
Edge falloff